
Wrong Solar Inverter Installation in Pakistan Is Causing Big Damage – Experts Share Simple Advice
Experts warn that wrong solar inverter installation is damaging systems across Pakistan. Simple mistakes are leading to costly repairs.

The solar panels are new. The inverter is branded. The batteries are fresh. Everything should work perfectly — but the inverter keeps shutting down, wires feel warm, and within a year, a major repair is needed. What went wrong? In many Pakistani homes, the answer is painful: nothing was wrong with the equipment. The installation was wrong from day one.
I write repair guides for SunTech Mall, where we supply parts to inverter technicians across the country. These technicians report a frustrating pattern: a large share of the damaged inverters on their benches were not victims of bad luck or bad brands. They were victims of bad installation — loose wires, wrong wire sizes, missing grounding, poor placement. Small mistakes, made in a hurry, that silently destroy expensive equipment.
Here is the fear every solar buyer should have: you can buy the best inverter in the market and still lose it to a careless installer. This guide shows you the most common installation mistakes in Pakistan, how to spot them, and how to make sure your system is set up right — in simple words anyone can understand.
Let us start with why installation matters more than most people think.
Note: This guide helps you understand and supervise. Actual electrical installation should always be done by a trained installer — but an informed owner catches mistakes the installer misses.
What You Will Learn in This Guide
- Why correct installation decides your inverter’s lifespan
- The 5 installation mistakes technicians see most in Pakistan
- How loose wiring creates hidden fire danger
- Why wire size is a safety issue, not a cost-saving opportunity
- Battery connection errors that kill inverters instantly
- Why grounding is never optional
- How wrong placement causes overheating
- How to choose a qualified installer
- What to check after installation is done
Why Installation Decides Everything
A solar inverter is the brain of your solar system. It connects panels, batteries, and your home’s appliances into one working whole. Every watt of power flows through the connections the installer makes.
When those connections are correct, the inverter runs cool, efficient, and safe for years. When they are wrong, the inverter works harder than it should, runs hotter than it should, and ages years in months. The damage is invisible at first — the system seems to work. But inside, parts are being stressed every single day.
Technicians put it simply: most expensive inverter repairs they perform could have been prevented on installation day. The tragedy is that installation mistakes are the cheapest problems to avoid and the most expensive to fix later.
Mistake 1: Loose Wiring — The Hidden Danger
Walk up to any inverter that “mysteriously” failed within its first year, and there is a good chance you will find a loose connection somewhere. Loose wiring is the single most common installation fault technicians report.
Here is why a loose wire is so dangerous. Electricity flowing through a poor connection meets resistance. Resistance creates heat — at the exact spot where the wire meets the terminal. This heat builds slowly, day after day, cooking the terminal, melting insulation, and eventually causing sparks.
The warning signs are a burning smell near the inverter, discolored or melted wire insulation, and sudden shutdowns that no error code explains. Many owners blame the inverter. The real culprit is the connection.
Every terminal should be tight, clean, and properly sized for its wire. This takes the installer minutes. Skipping it costs the owner a fortune.
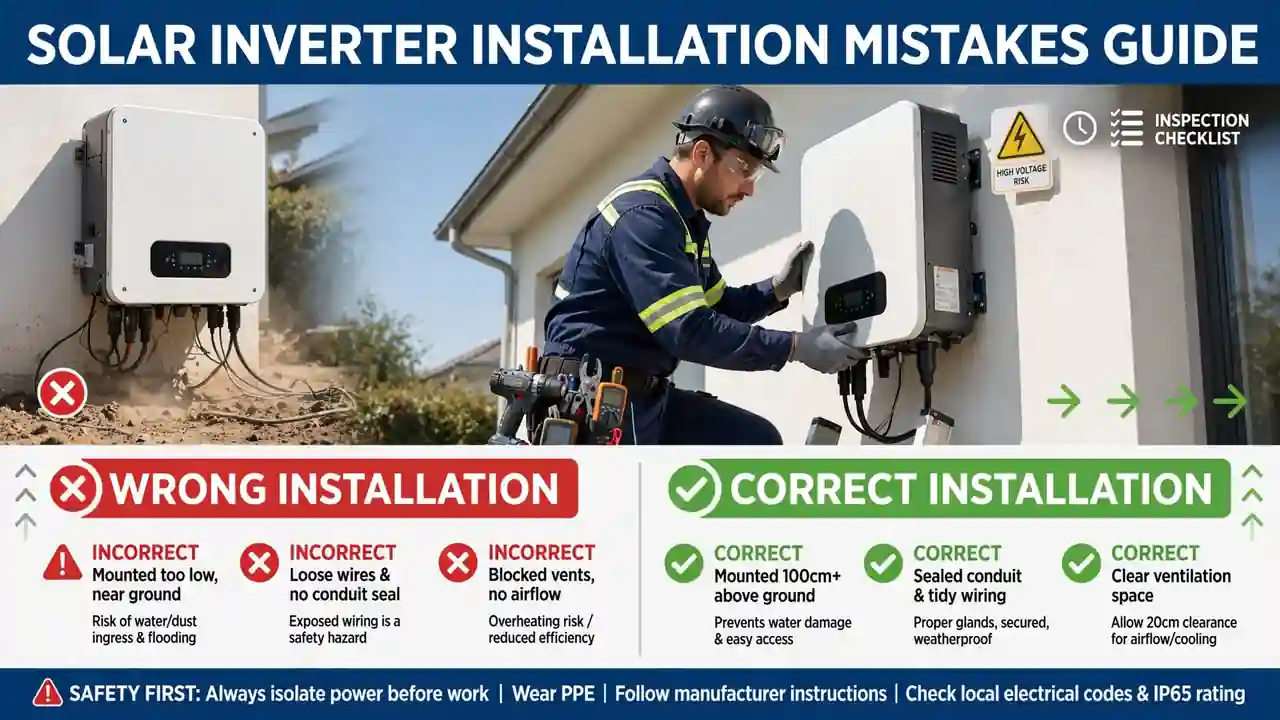
Bonus Tip: After installation, ask the installer to tug-test each major connection firmly. A properly tightened terminal will not move. Then ask them to recheck tightness after one month — wires settle, and connections made on day one can loosen slightly.
Mistake 2: Wrong Wire Size — A Safety Issue
Every inverter manual specifies minimum wire sizes. These numbers exist for safety, not suggestion. Yet undersized wiring is everywhere in Pakistani installations — usually to save a little money on copper.
Thin wires cannot carry heavy current comfortably. They heat up. This heat wastes your solar power, causes voltage drops that overwork the inverter, and damages insulation over time — creating shock and fire risk.
The cruel irony: the money saved on thinner wire is tiny compared to one repair caused by overheated connections. Wire is cheap. Inverters are not. Never let an installer downsize wires to cut the quote.
If your wires feel warm during normal operation, they are too thin or too loose. Wires should run cool. Warmth is a warning.
Mistake 3: Battery Connection Errors
Batteries store enormous energy, and connecting them wrong can destroy an inverter in seconds. Yet battery mistakes are frighteningly common.
Reversed polarity — positive to negative — can blow fuses instantly and damage the control board. Wrong voltage — a 24V bank on a 48V inverter, or mismatched batteries — confuses charging and damages components.
Loose battery terminals cause the same heating problem as loose AC wiring, but with even higher currents involved. Battery terminals should be clean, tight, and protected from corrosion.
Before the installer connects batteries, the voltage and polarity of every string should be verified with a multimeter. This two-minute check prevents the most catastrophic installation error possible.
Note: Battery mistakes can also be dangerous to people, not just equipment. Shorted battery terminals can produce arcs, heat, and acid spray. Never attempt battery connections yourself unless you are trained.
Mistake 4: Poor or Missing Grounding
Grounding — the safety wire that connects your system to the earth — is the most skipped step in Pakistani installations. Many systems have weak grounding. Some have none at all.
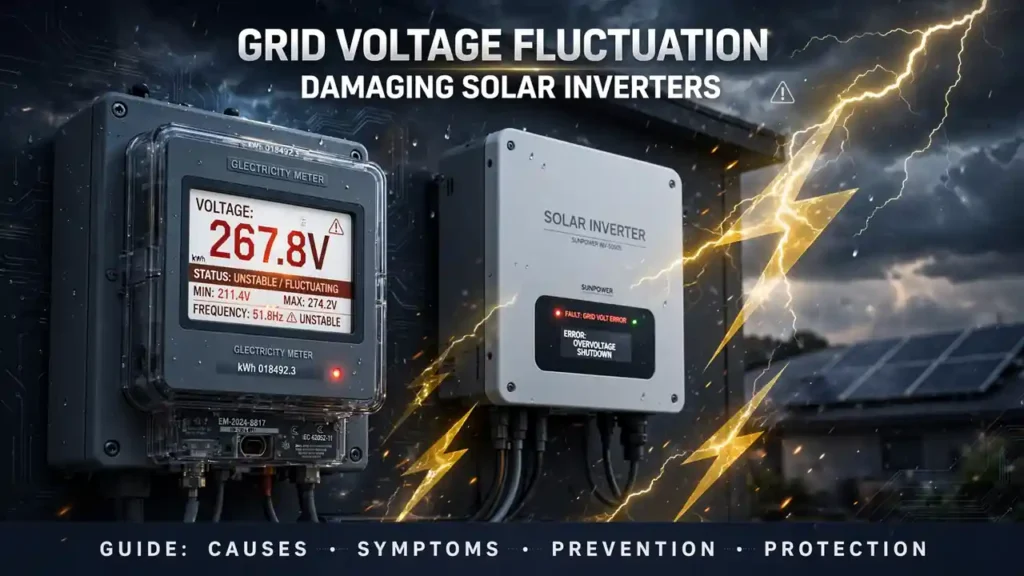
Grounding protects against two threats. First, electric shock: if a fault makes the inverter’s metal case live, grounding gives that current a safe path to earth instead of through you. Second, voltage spikes: lightning and grid surges need a path to ground, or they travel through your inverter’s delicate electronics instead.
Without proper grounding, the inverter is exposed to every spike the grid and sky deliver. Control cards — the most expensive single part — are especially vulnerable. Learn how grid voltage fluctuation damages inverters to understand what grounding protects against.
Proper grounding means a dedicated earth wire, a proper earth rod or plate, and verified low earth resistance — not a wire twisted around a water pipe. Ask your installer to show you the earth point and explain how it was done.
Mistake 5: Wrong Placement — Cooking Your Inverter
Where the inverter lives decides how long it lives. Yet installers often mount it wherever is convenient — inside closed cabinets, in kitchens, near heat sources, or in direct sun.
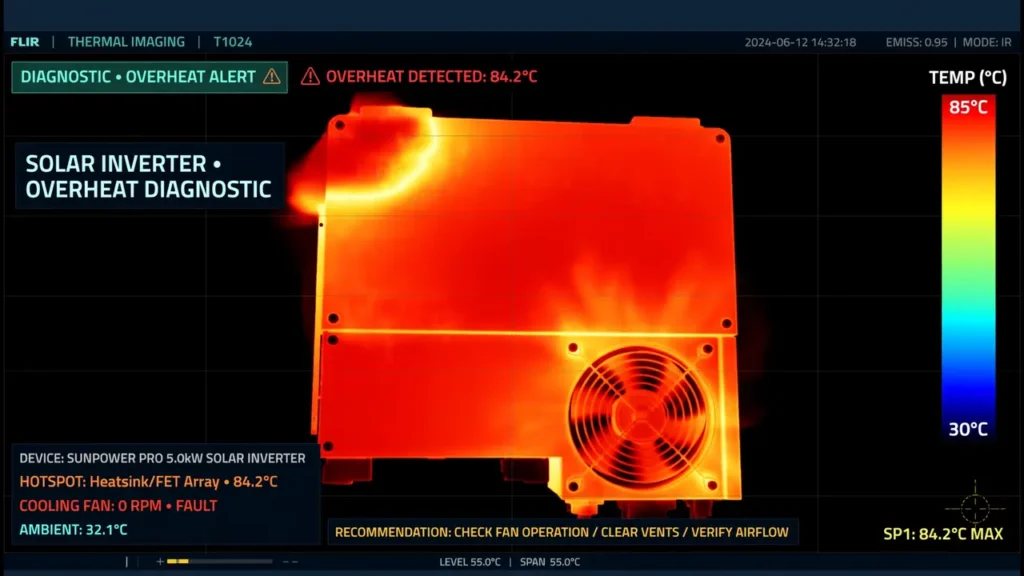
An inverter in a closed space cannot shed heat. Temperatures climb, fans run constantly, and internal parts age rapidly. Inverters near kitchens collect grease and heat. Units in direct sunlight start every day already hot.
The rules are simple: open and ventilated, away from heat and sun, clear space on all sides, and off the dusty floor — wall-mounted at a sensible height. Read our full guide on overheating from poor placement and fan failure.
Placement costs nothing to get right on day one and is very expensive to fix later, when moving the inverter means rewiring the whole system.
How Small Mistakes Become Big Repair Bills
Installation damage follows a cruel timeline. At first, everything works. The owner is happy. But inside, loose connections are heating, thin wires are stressing, and poor ventilation is cooking.
After months, parts start failing. MOSFETs burn from unstable power — see why MOSFETs burn. Capacitors dry out from chronic heat — see capacitor failure from heat. The control board suffers from spikes that grounding would have absorbed.
By the time the inverter stops working, multiple parts are damaged. Simple repair is no longer possible — full board repair or replacement is needed. The bill that arrives is many times what correct installation would have cost.
This is why technicians say: the most expensive inverter is the one installed cheaply.
How to Choose a Qualified Installer
Choosing the installer is the most important decision in your entire solar purchase — more important than the inverter brand. Here is how to choose well.
Ask about experience. How many installations have they completed? Can they name the inverter brands they have worked with? Experience shows in the answers.
Ask about materials. A good installer specifies wire sizes, breaker ratings, and grounding method upfront. If the quote is vague about materials, the installer plans to use whatever is cheapest.
Ask for references. A confident installer shares contacts of previous customers. Call them. Ask if the system works well and whether the installer provided after-service.
Ask about grounding and safety. If the installer dismisses grounding as unnecessary, walk away. That single answer tells you everything about their standards.
Do not choose on price alone. The cheapest quote usually means thinnest wires, skipped grounding, and rushed work. The difference between a cheap and a proper installation is small — the difference in outcomes is enormous.
Bonus Tip: A professional installer inspects your site, calculates your load, and explains the system design before starting. Anyone who gives a quote without seeing your home is guessing — and you will pay for their guesses later.
Your Post-Installation Checklist
Installation day is your best chance to catch mistakes — because fixing them later costs far more. Walk through this checklist with your installer before making the final payment.
Connections: Every terminal tight? Tug-test the major ones. No loose strands sticking out?
Wire sizes: Do the installed wires match what was quoted and what the inverter manual requires?
Grounding: Is there a proper earth connection? Can the installer show you the earth point?
Placement: Is the inverter ventilated, shaded, and clear of heat sources and dust?
Batteries: Voltage and polarity verified with a meter before connection? Terminals tight and clean?
Demonstration: Does the installer show the system working under real load — not just switched on?
Documentation: Do you have warranty papers, the system diagram, and the installer’s contact for after-service?
Keep this list. Check these points every few months afterward — wires settle, and early catches prevent late disasters.
Quality Parts Complete the Picture
Good installation with bad materials still fails. Low-quality wires, breakers, and connectors undermine even careful workmanship.
SunTech Mall provides quality solar electrical components — proper breakers and cables, protection devices, and original inverter spare parts — through the electrical and solar range. When your installer uses quality materials from a trusted supplier, the whole system benefits.
If you ever need replacement parts after installation, the SunTech Mall shop delivers original components anywhere in Pakistan.
Frequently Asked Questions
How do I know if my inverter was installed incorrectly?
Warning signs include frequent shutdowns, burning smells, warm wires, flickering output, and error codes within months of installation. If problems started early, poor installation is a likely cause. Have an independent technician inspect wiring, grounding, and placement.
Can wrong installation damage a brand new inverter?
Yes. Incorrect wiring, missing grounding, or wrong wire sizes can damage internal components within days or weeks. This damage is often not covered by manufacturer warranty, leaving you with the full repair bill.
What should I check right after installation?
Verify tight connections, correct wire sizes, proper grounding, ventilated placement, and correct battery voltage and polarity. Ask for a live demonstration under load, and keep all warranty and documentation safe.
Is professional installation really worth the extra cost?
Yes. The price difference between cheap and professional installation is small compared to one major repair. Proper installation prevents damage, reduces downtime, and protects your warranty — it pays for itself many times over.
My installer skipped grounding. How urgent is it to fix?
Very urgent. Without grounding, your inverter has no protection against voltage spikes and fault currents. Every storm and grid fluctuation is a risk. Have proper grounding added by a qualified electrician as soon as possible.
Can I fix installation mistakes myself?
Basic checks like clearing blocked vents are safe. But tightening electrical terminals, correcting wiring, or adding grounding involves shock and fire risk — leave electrical corrections to trained professionals.
Where can I buy quality installation materials in Pakistan?
SunTech Mall offers quality breakers, cables, protection devices, and original spare parts with nationwide delivery. Visit the SunTech Mall shop to browse.
Final Thoughts
Your solar system is only as good as its installation. The panels can be premium, the inverter branded, the batteries fresh — but if the wires are loose, the grounding missing, and the inverter baking in a closed box, you do not have a solar system. You have a countdown.
The good news: every mistake in this guide is preventable. Choose a qualified installer. Insist on proper materials. Walk the checklist on installation day. These simple actions protect an investment worth lakhs and give you the reliable power you paid for.
Solar energy should bring peace of mind, not repair bills. Install it right the first time — and for quality parts and honest guidance, SunTech Mall stands with you, delivered anywhere in Pakistan.