
3-Pin Rocker Switch: How to Wire It Without Guessing
The 3 Pin Position Rocker Switch is a versatile and widely-used component in electrical systems, offering simplicity, reliability, and control. Whether you're working with automotive, marine, or industrial applications, this switch plays…

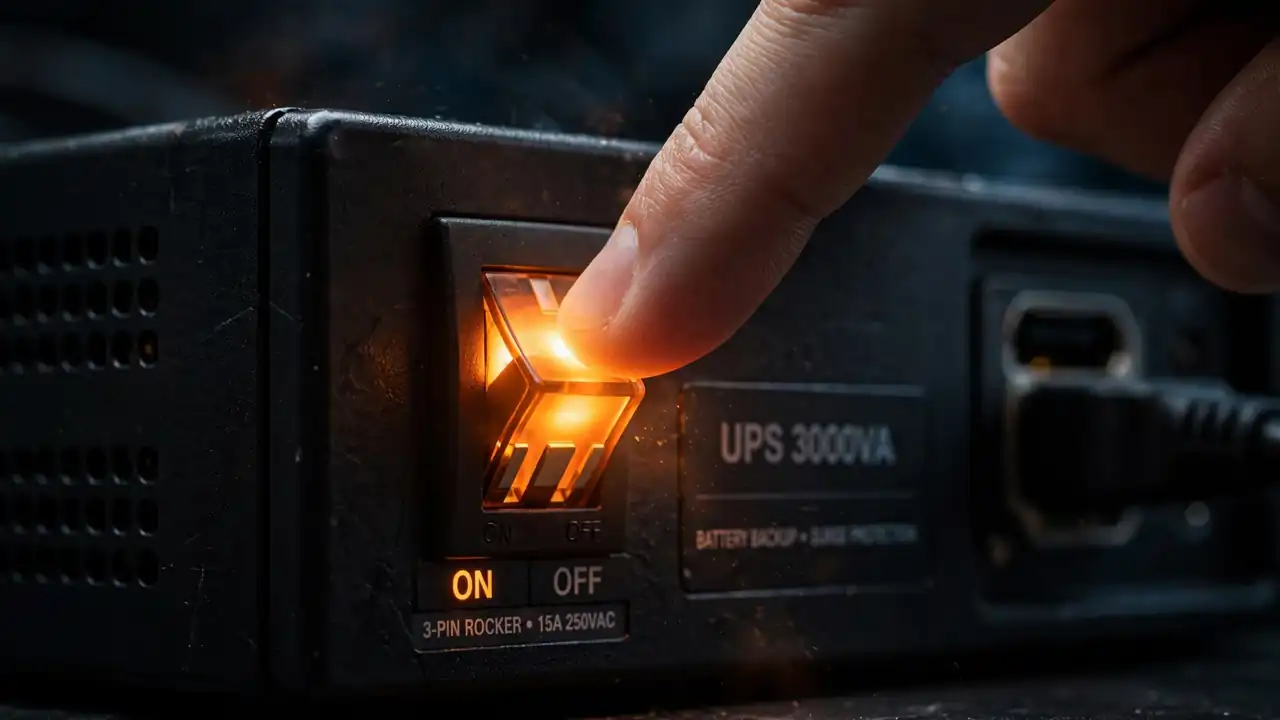
A 3-pin rocker switch is a small switch you rock one way for ON and the other way for OFF — but the third pin does two different jobs depending on the switch type, and wiring the wrong type the wrong way is how panels fail. This guide starts with the step most guides skip: find out which kind of 3-pin switch you are holding. Once you know that, the wiring is simple.
First, which kind of 3-pin switch do you have?
There are two common 3-pin designs, and they look almost identical from the top. Confusing them is the root of most wiring mistakes. A quick check of the diagram on your 3-pin rocker switch settles which design you have.
Type A — SPDT changeover switch. One common pin in the middle and two output pins, one on each side. Rock it one way and the middle pin connects to the left pin. Rock it the other way and the middle pin connects to the right pin. This is the type UPS and inverter panels use when one switch must choose between two circuits or two modes.
Type B — Illuminated SPST switch. Power in, load out, and a third pin for the little lamp inside the rocker. The lamp lights when the switch is ON. Here the third pin is not a second output at all — it goes to ground or neutral so the lamp has a complete circuit.
How to tell them apart: read the diagram printed on the switch body or its packing. If there is no diagram, use a multimeter on continuity mode. Flip the rocker both ways and test each pair of pins. On a changeover switch, the middle pin will show continuity to one side pin in each position. On an illuminated switch, no position will give you that changeover pattern, and one pin will be marked for the lamp, often in brass or with a lamp symbol.
Never guess. A two-minute test beats a burned contact.
What SPST and SPDT actually mean
These short codes describe what the switch does inside:
- SPST (Single Pole, Single Throw): one input, one output. Power either flows or it does not. This is plain ON/OFF. A basic rocker needs only two pins for this.
- SPDT (Single Pole, Double Throw): one common input, two outputs. The common connects to output A in one position and output B in the other. This is the classic 3-pin changeover job.
- DPDT (Double Pole, Double Throw): two circuits switched at once. It needs six pins, not three. If a listing calls a 3-pin switch “DPDT,” the seller does not understand the part. Treat that listing as suspect.
| Switch type | Pins | What the third pin does |
|---|---|---|
| SPDT changeover (3-pin) | Common + 2 outputs | Second output: the switch chooses between two circuits |
| Illuminated SPST (3-pin) | Power + load + lamp | Lamp circuit: lights the rocker when ON |
| Plain SPST (2-pin) | Power + load | No third pin exists |
| DPDT (6-pin) | 2 commons + 4 outputs | Not a 3-pin switch at all |
Read the ratings before you wire anything
Every rocker switch carries two numbers that keep it from melting: voltage and current. Both are usually printed on the switch body.
- Voltage rating (for example 250 V AC): the most voltage the switch can safely break. Never exceed it.
- Current rating (for example 10 A or 16 A): the most current the contacts can carry without overheating. Your load must stay below this, with margin.
A useful rule: pick a switch rated at least 25 to 30% above your real load current. A switch run at its exact limit all day runs hot, and heat is what kills contacts. If your load draws 8 amps, a 10-amp switch is tight. A 16-amp switch is comfortable.
One more trap: DC ratings are always lower than AC ratings for the same switch. A DC arc is harder to break than an AC arc, because AC passes through zero 100 times a second and DC never does. If you switch a battery-side DC load, the switch must be rated for your DC voltage and current in writing. Never assume the AC number covers DC use. For a sense of how manufacturers rate a 3-pin rocker switch, see Carling Technologies’ rocker-switch specifications.
Also check the panel cutout size before you order. Rocker switches come in several standard sizes, and a switch that does not fit the hole is useless no matter how good its ratings are.
How to wire a changeover (SPDT) 3-pin switch
Work with all power off. Unplug the UPS, disconnect the battery, and switch off the mains breaker for that circuit. If any wire confuses you, stop and call a qualified electrician.
- Find the common pin. On most changeover rockers it is the middle pin. Confirm with your multimeter, not with hope.
- Connect power to the common pin. This is the wire bringing power in.
- Connect circuit A to one outer pin and circuit B to the other outer pin. Rock the switch each way to check which side is live in each position.
- Insulate every joint. Use proper crimp terminals or soldered joints, then heat-shrink tubing or tape over bare metal. Loose joints arc and heat up.
- Test before you close the panel. Restore power, rock the switch both ways, and confirm each position does what your circuit diagram says. Only then screw the panel shut.
For a plain ON/OFF job on a changeover switch, use just one outer pin and leave the other empty. It works fine as ON/OFF. You are simply not using the changeover feature.
How to wire an illuminated 3-pin switch
The steps look similar but the third pin is different, so do not copy the changeover wiring:
- Find the power pin. This takes the incoming supply.
- Connect the load to the output pin. This feeds your device.
- Connect the third pin to ground or neutral, as the switch diagram shows, so the lamp can light. This pin carries only the small lamp current, never the load.
- Insulate, test, then close the panel, exactly as above.
Take a phone photo of the original wiring before you disconnect anything. That one photo has saved more repairs than any diagram.
Why rocker switches melt, go loose, or stop clicking
A rocker switch is mechanical, so it wears out. These are the failure signs repair shops see most:
- Melted or fused plastic. Almost always a rating mismatch: a switch rated for a few amps switching a much bigger load. Contacts overheat, plastic softens, and the switch fuses into its hole.
- Loose, mushy action. Healthy rockers snap crisply. When the action goes soft or the rocker sticks between positions, the springs and contacts are worn. Replace it before it causes arcing.
- Burned contacts from loose joints. A loose crimp arcs every time the load switches. Arcing pits the contacts, which makes the joint worse, which makes more arcing. Tight joints from day one prevent this spiral.
- Fake ratings. Counterfeit switches carry printed specs their insides cannot meet. If the printing is missing, blurry, or looks tampered with, treat the switch as suspect.
When a load is bigger than any sensible rocker rating, do not force it. Use the rocker to drive a relay or contactor, and let the relay carry the heavy current. The rocker then switches a tiny control current, and the relay does the hard work. That relay approach also protects a 3-pin rocker switch from the high inrush of a heavy load.
Choosing a switch that lasts
- Ratings with margin: at least 25 to 30% above your real load.
- Contact material: silver-alloy contacts handle arcing better than bare brass.
- Mechanical life: quality switches are rated for tens of thousands of cycles. Cheap ones go wobbly fast.
- Mounting size: measure your panel hole first.
- Illuminated or plain: illuminated rockers help in dark UPS rooms, where you want to see at a glance whether the unit is on.
- Genuine source: buy from a supplier who stands behind the printed spec sheet.
Safety checklist before you touch a wire
- Power fully off: UPS unplugged, battery disconnected, breaker off.
- Switch type identified: changeover or illuminated, confirmed by diagram or multimeter.
- Ratings checked: voltage and current, with margin, and DC rating if the load is DC.
- Joints tight and insulated before power returns.
- Both positions tested before the panel closes.
- Unsure about any wire: stop and call an electrician. No repair is worth an injury.
Frequently asked questions
Can a 3-pin rocker switch handle a heavy load?
Only if its printed ratings allow it. Check amps and volts on the switch body, keep your load below both with margin, and use a relay for loads beyond the rating.
What is the difference between SPST and SPDT?
SPST is plain ON/OFF: one input, one output. SPDT is changeover: one common input and two outputs, so the switch picks between two circuits. A 3-pin rocker is SPDT when all three pins are changeover pins — but some 3-pin rockers are illuminated SPST instead, so check first.
Can I use a 3-pin rocker switch for DC circuits?
Yes, but only if it is rated for your DC voltage and current. DC ratings are lower than AC ratings on the same switch. Never assume the AC rating covers DC use.
Are there waterproof rocker switches?
Yes. Sealed rockers with high IP ratings, such as IP65 and above, are made for marine, automotive, and outdoor panels. They cost more but survive dust and water that would kill a standard switch.
My rocker feels loose and no longer clicks crisply. Is it dead?
Almost certainly. A crisp snap means healthy springs and contacts. Mushy or sticking action means the mechanism is worn. Replace it before it causes intermittent contact and arcing.
Can I wire a 3-pin changeover rocker as a simple ON/OFF switch?
Yes. Connect power to the centre (common) pin and your load to one outer pin, and leave the other outer pin empty. It will work as a clean ON/OFF switch.
The next step
You now know the step that prevents most mistakes: identify the switch type first, then wire to that type. A well-chosen 3-pin rocker switch, fitted with the correct ratings, should click cleanly for years. When you need the part itself, browse SunTech Mall’s shop and check the ratings printed on the switch before you order. For the capacitors that fail alongside tired switches, read our 50V 100uF capacitor guide.
Sources: Cirkit Designer rocker-switch pinout reference (SPDT: common, normally open, normally closed), Daier rocker-switch guide (illuminated 3-pin: power, load, ground for the lamp), Learning About Electronics SPST rocker wiring, Engineer Fix 3-prong rocker guide.
Related Technical Guides
 Category:
General
How to Test a MOSFET With a Multimeter 2026: Find a Bad MOSFET Before It Burns Your Board
Last month, a technician brought me a dead inverter board. He had already fitted a new MOSFET. The board died again in…
 Category:
General
Inverex Nitrox Fault Codes 2026: Technician’s Complete Decode List for F01 to F64
Inverex Nitrox Fault Codes 2026: Technician’s Complete Decode List for F01 to F64 One evening, a shop owner called me. His Inverex…
 Category:
Electronic Parts
How to Find Genuine UPS Spare Parts Near You in Pakistan
Looking for genuine UPS spare parts in Pakistan? Learn how to check original UPS spare parts and where to buy trusted UPS…
1 Comment
[…] So when do you pick the 50V 100uF electrolytic? When you need a solid chunk of capacitance — around 100 microfarads — for filtering or coupling in a low-to-medium voltage circuit. That is its home turf. For more on the components that work alongside capacitors in repair work, see our guide to the 3-pin rocker switch for UPS and solar inverters. […]